
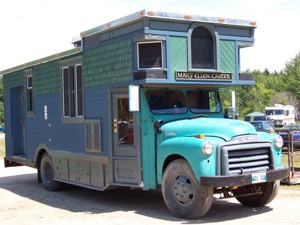
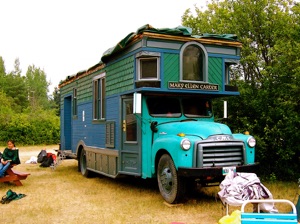
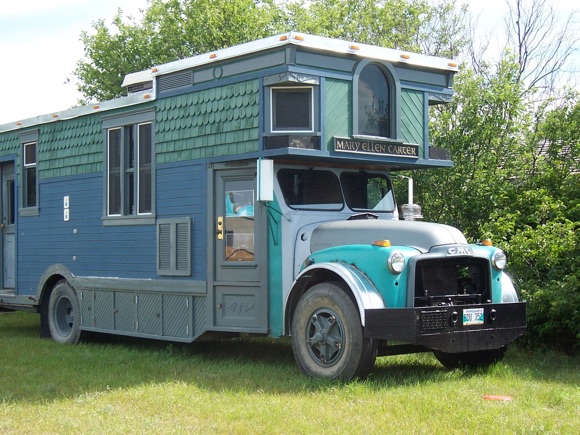
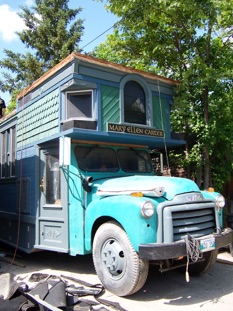
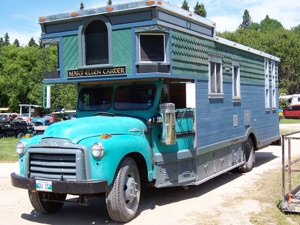
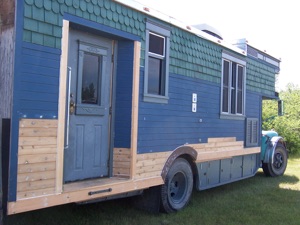
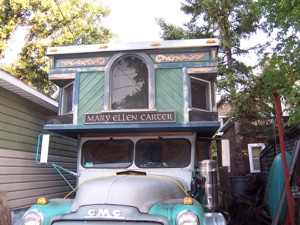
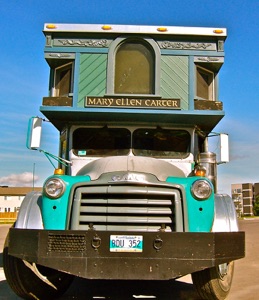
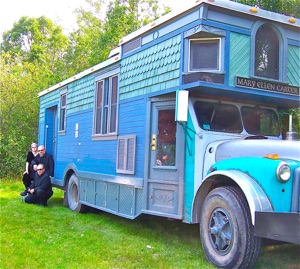
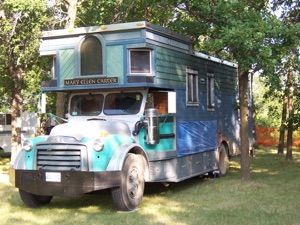
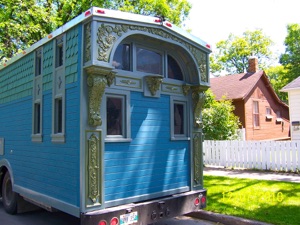
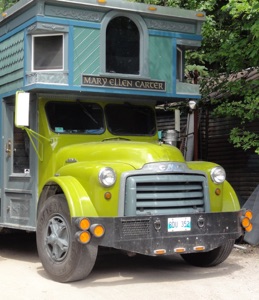
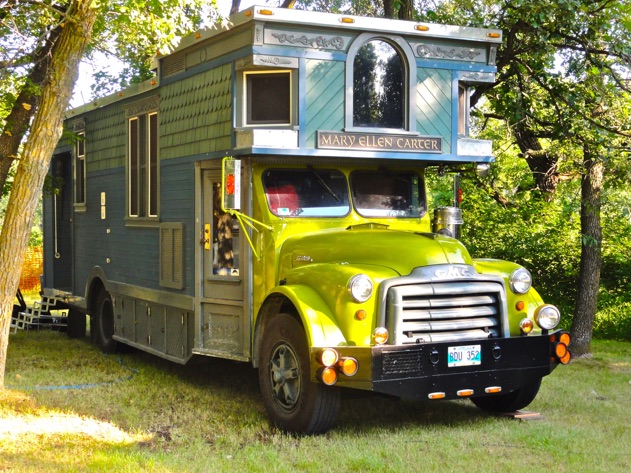
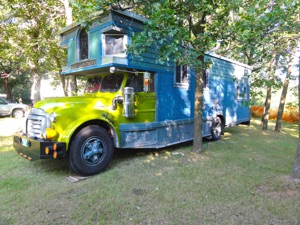
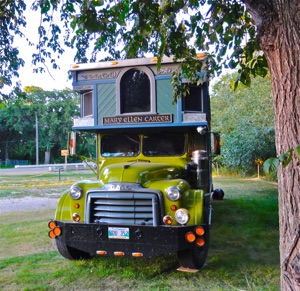
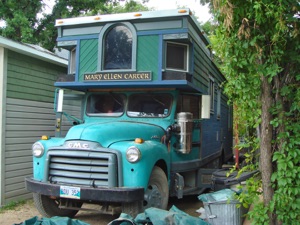
The Mary Ellen Carter
The greatest and most complex project I have done to date is STILL an ongoing project. It has taught me to be tenacious, patient, persevering and that failure is unthinkable...

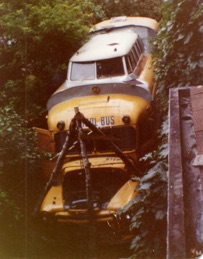
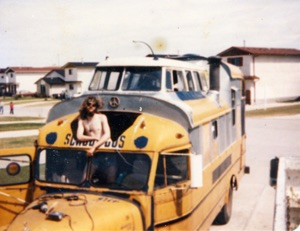
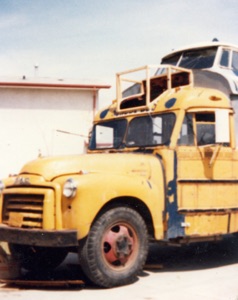
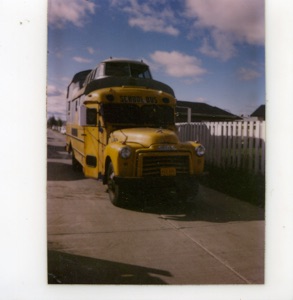
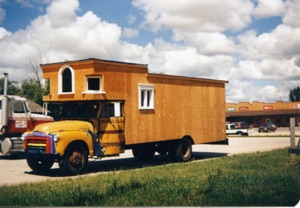
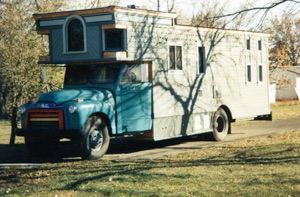
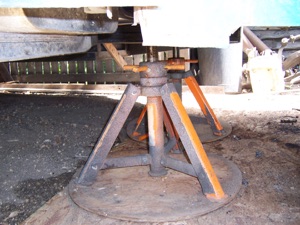
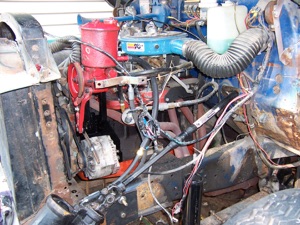
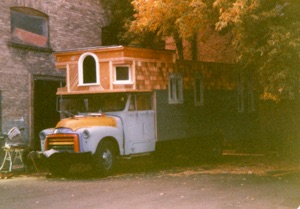
In the spring I added the Volkswagon van roof and reinforced the roof structure.. I re-tinned all of her transition points The engine was long seized and parts were unobtainium so I adapted a newer 292 GMC 6 cylinder into her engine berth with the crude tripod you see here. I had to do a class one overhaul of her entire braking system. ( One of many I am afraid as the years would pass). I adapted the electrical system to 12 volts. I had to go through the entire power train repairing whatever it took just to get her roadworthy the first time. If I am making all this sound easy - believe me it was not! The last picture above was her maiden voyage
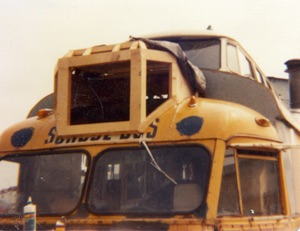
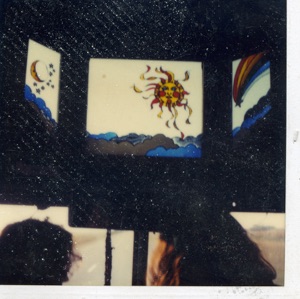

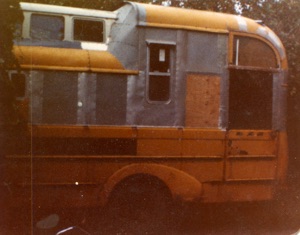
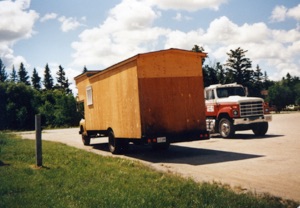
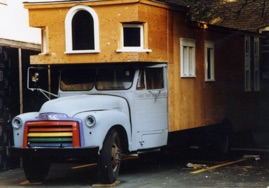
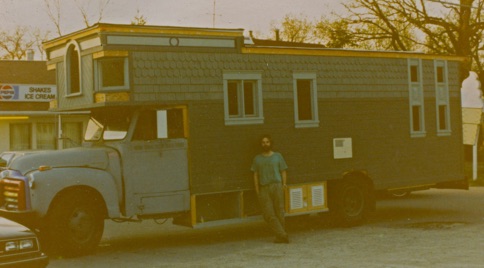
The next spring I built a small bay window on the front and added some liquid lead “Stained Glass” to the inside. It was really very pretty. Then the project languished for a few years which proved to be a useful observation tool as I noticed endless upcoming rust and rot problems where wood met with steel due to condensation as the temperature swings above and below freezing. In just a few years it was quite noticeable. I vowed to do better. I had been working with a few builders and one day found me building a load bearing plywood box beam to hang a ceiling off of over a swimming pool. I realized the potential strength of this immediately and in seconds had a plan for the new body. So off came the old one.
I cut, stepped, and lengthened the frame. Added proper shock absorbers and beefed up the springs.

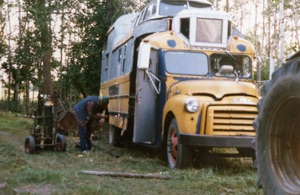
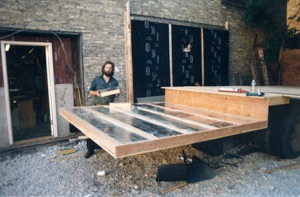
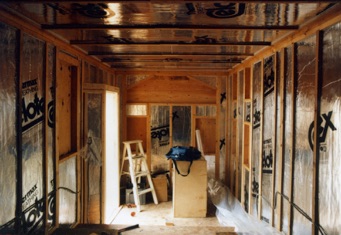
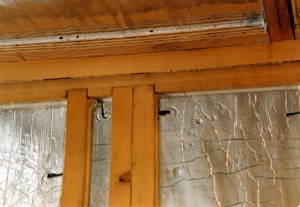
From here I began building the floor. I made my own 4x4 frame members by laminating the clearest, tightest grained douglas fir I could find together and milling them down to about 3 1/4” square. Then they were all dadoed into the perimeter members like a ship and then glued and screwed together. I used a rigid polyurethane board ( new technology at the time) that boasted R23 in 3 inches with the 1/4” air space. Then 3/4” Douglas Fir plywood was then glued and screwed onto the framework both sides taking care to tie the step down area together. This step I realized early on would be one of the many strength advantages of this design. This is summer of 1986.
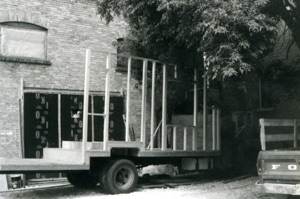
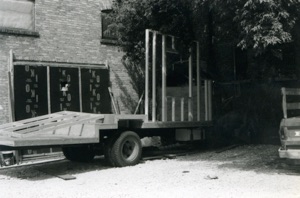
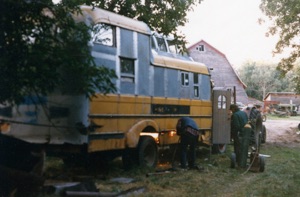
This picture shows how all the studs were lapped into the plates just like a ship. All glued and screwed together. I decided to not have a door on the back to optimize strength in side to side movement.
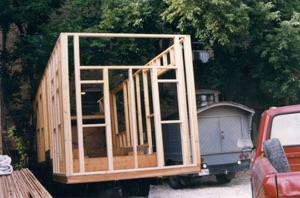
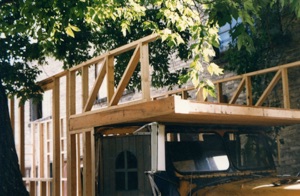
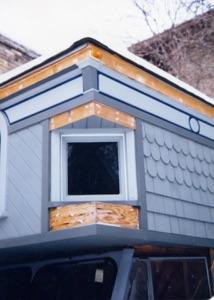
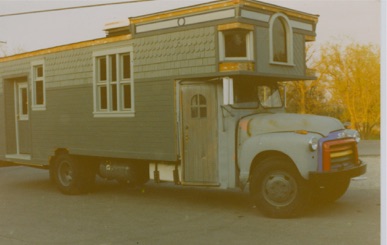
The loft over the cab has no side windows because it is a huge structural truss. When I laminated the 1/2” douglas fir plywood skin over all the framework I had a design that is formidably solid to this day!


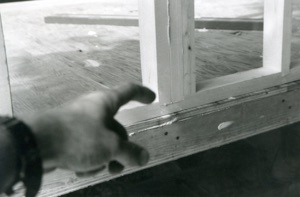
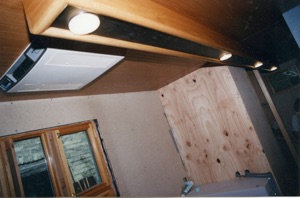
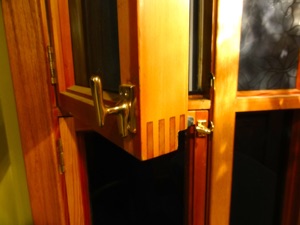
I made allowances for all the windows I wanted in the framing before I skinned it. Then as I made them one by one I simply cut out the plywood with a router and installed them. I made all the windows and doors.

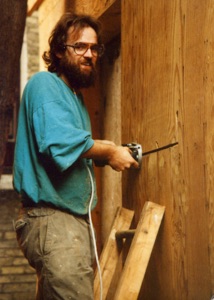
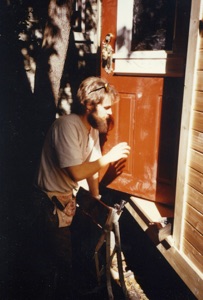
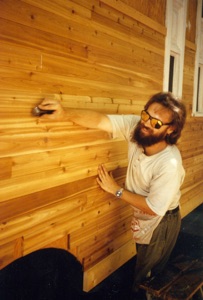
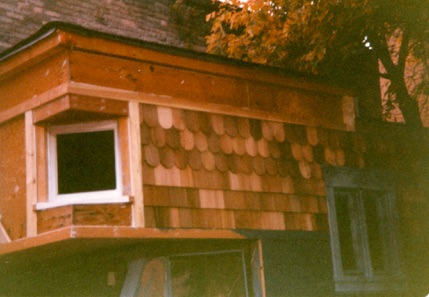
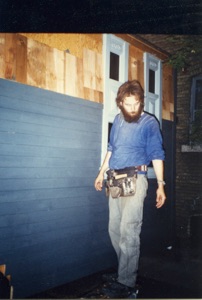
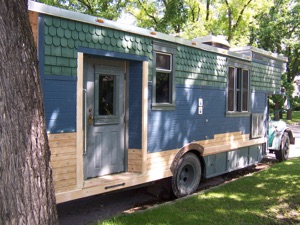
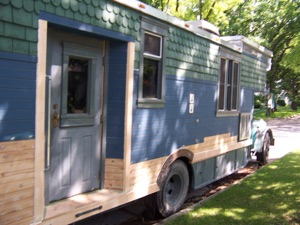
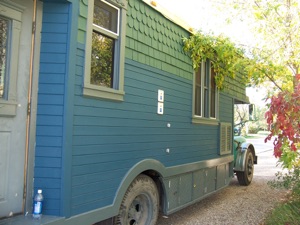
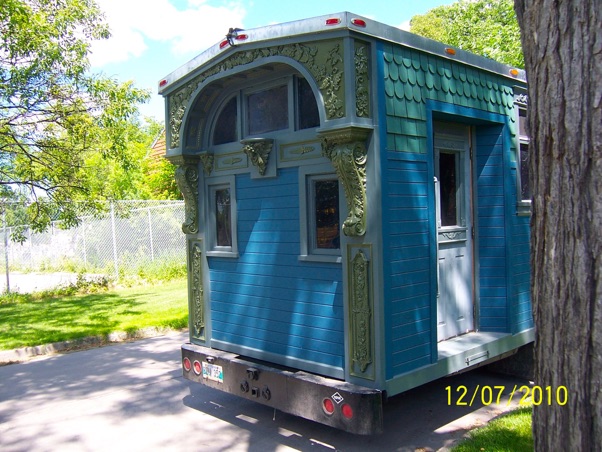
I made all the siding and shingles too as stuff for houses was all the wrong proportions. I found a restaurant being demolished and salvaged the siding reshaped it and cut new tongue and grooves into it. I resized house shingles and cut them into fish scales.
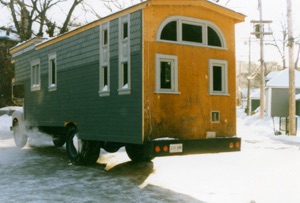
Ahhh the 80’s. When we could still wear rainbow stuff............

I have always had this idea that curved shapes are safer in a moving vehicle. The frame work I used to bend the veneer became the cabinets it encompassed when I had it completed


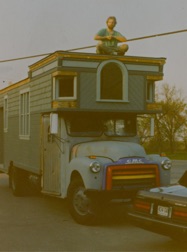
This was a period of intense building and there really were no resources to help figure things out.This was long before the internet. I really had to make it up as I went along. There were substantial engineering challenges at almost every aspect of construction, not the least of which was managing weight and power.Shortly after these last pictures were taken MIss Mary would wind up sitting for many years starting in 1992...........


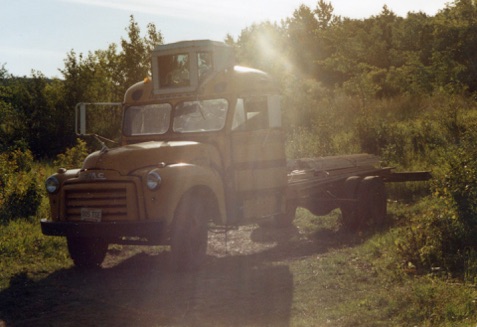
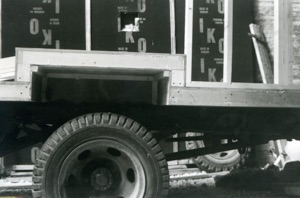
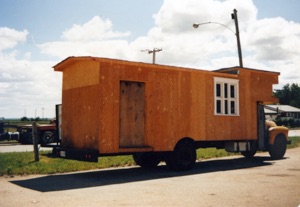
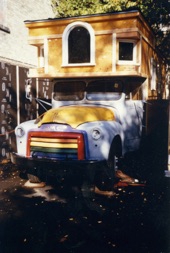
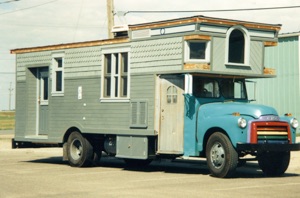
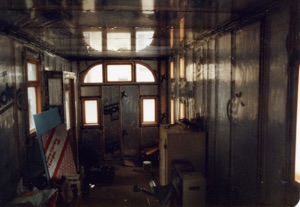
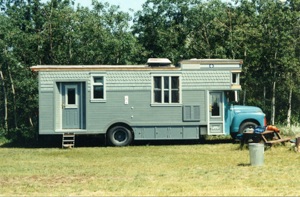
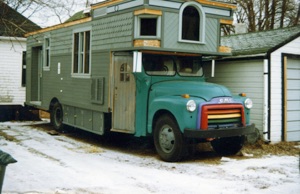
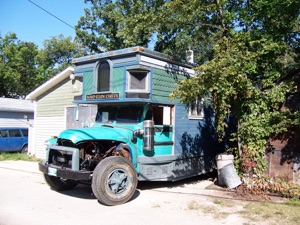
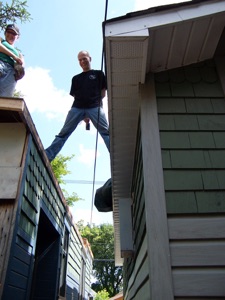
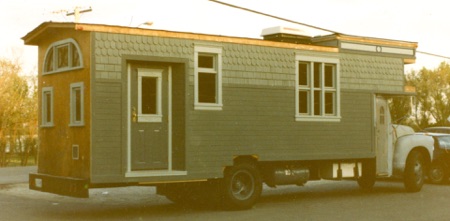
What would become The Mary Ellen Carter was essentially an abandoned project that came in on the back of wrecker one day to a service station I drove by every day. I drove by it for a year trying to figure out what I might do with it if I bought it. One day it dawned on me I could live in it.The original roof raising was on the verge of collapse so the first order of business was to stabilize it. Then I hunkered down for the long winter of 1980-81
As any builder of a housetruck will tell you this is quite often the end of the story for their project. Life often gets in the way about this time in the form of a job, career, family, maybe health issues and these wonderful starts on a neat project often lie rotting away in a backyard abandoned and fodder for target practice or vandalism. They usually find their way to the scrap yard at some point. As many will tell you this might not have been the worst plan for this project as she would try my will at many turns...........
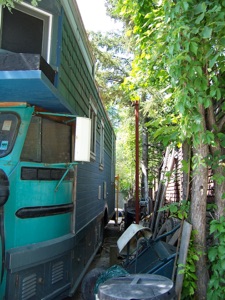
In retrospect I think one of the reasons this project languished is that living in a vehicle full time is a type of lifestyle that is not always practical . It has many obvious disadvantages not the least of which is how does one make a living? As a guy with many interests I would be needing a home base with a good workshop. It was never going to be what I started out with. And so it sat. What was I going to do with it? It served as junk storage for years.
I had started a bluegrass / gospel band in the new millennia and had begun making some real headway with it. However to play at many of the shows and festivals meant travel and maybe (UGH!!) camping. I learned a long time ago that sleeping in a tent and using my body to try and heat the earth was not an option for me or the band. It dawned on me that Miss Mary might finally have a purpose!
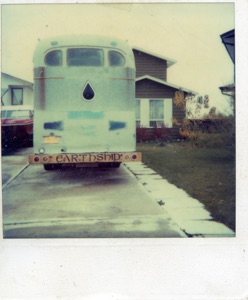
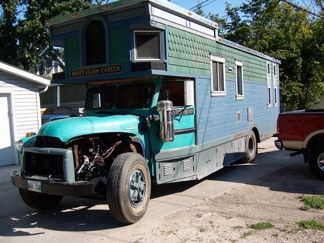
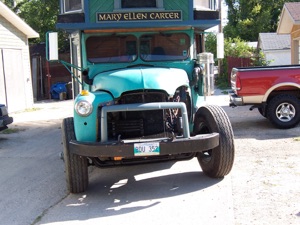
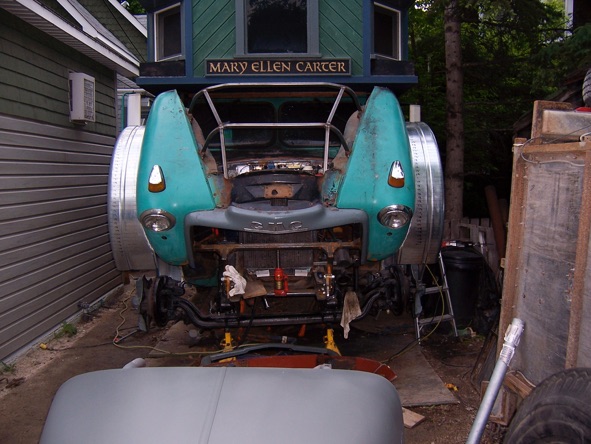
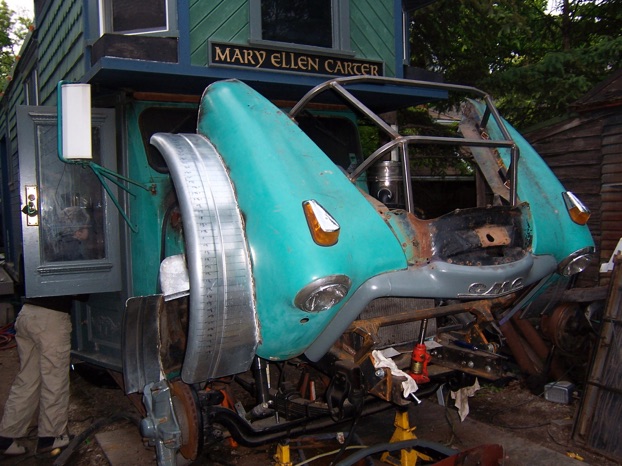
And so in 2006 I deemed it time to see what might be involved in making her roadworthy again. Again this might have been a great time to run screaming into the forest. Her entire braking system was seized from sitting. Amazingly she did run on the skunky old gas I had treated in her tank years ago, but the tank was all rusty. I had converted her to a dual fuel vehicle (gasoline/propane) in the 80’s so it would have to be propane for now. The roof was rotten around the air conditioner and I had had a tarp on her for years already. But I did get her road worthy and off to the Folk Festival for the first time in many years! One of the last things I did before I left was finally make her plaque and she was officially The Mary Ellen Carter!

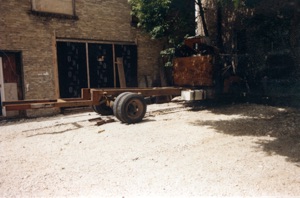
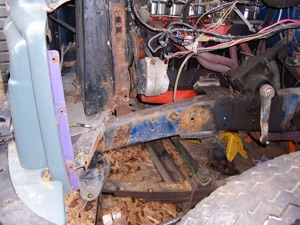
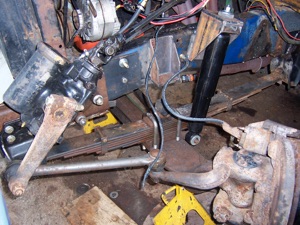
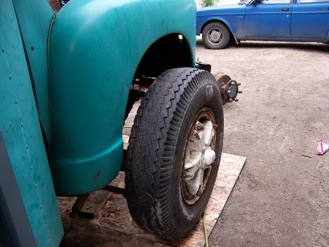
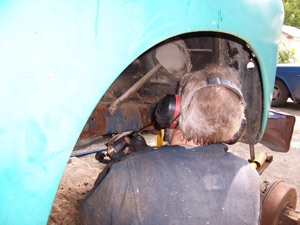
One thing I noticed ( among hundreds) was that if I was going to be driving her a lot, her manual steering gear was not going to cut it. Maneuvering her out of her tight spot next to my shop involved a workout you could not get in a gym! You could not really turn the wheels unless it was moving and even then it was a handful. This was not going to work. And so out came the old front end.
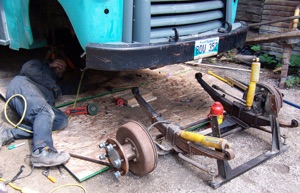
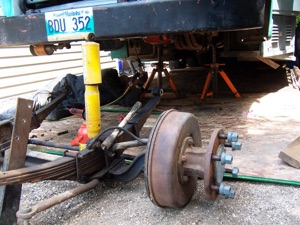


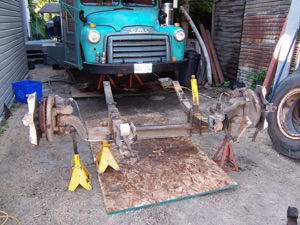
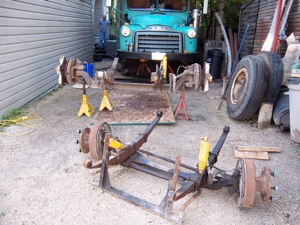


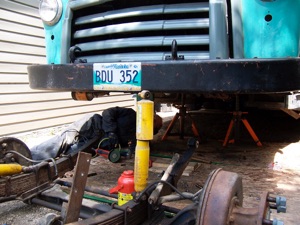


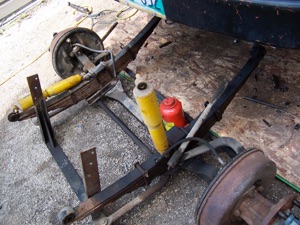
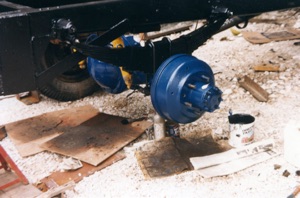
I had salvaged a heavier , wider front axle from a 6500 series GMC that would give me disc brakes and power steering. Something her original engineers could have only dreamed of.

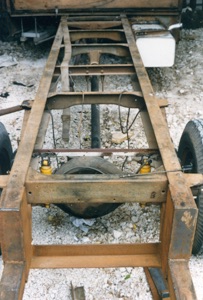
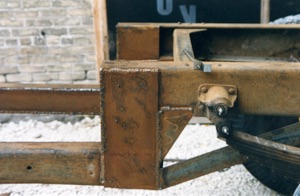
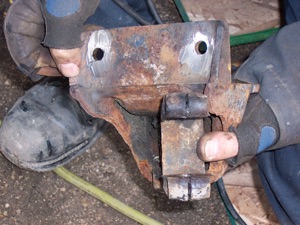
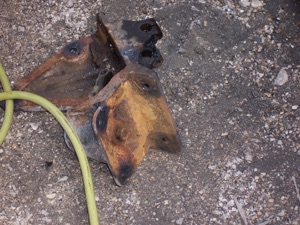
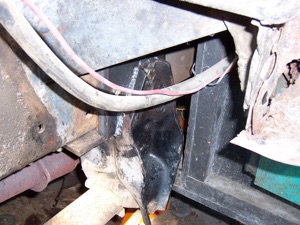
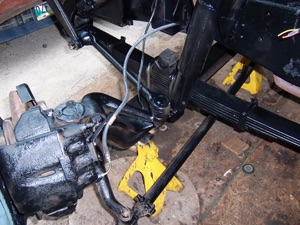
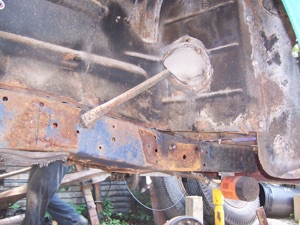
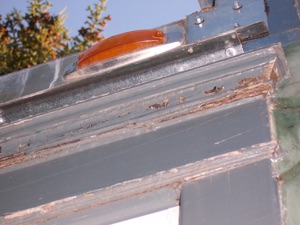
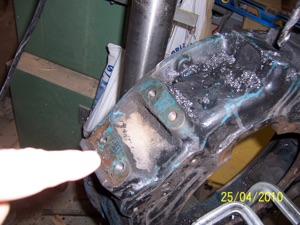
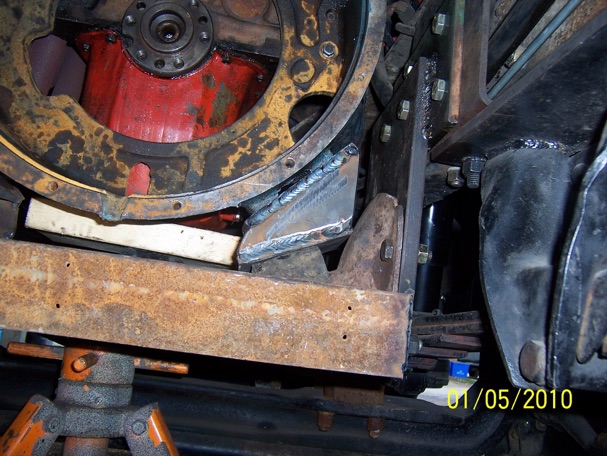
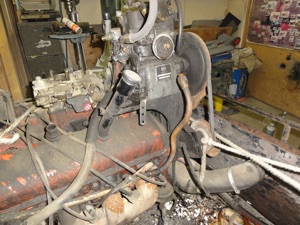
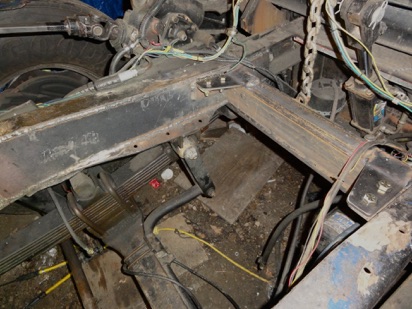
I had to relocate the steering box from the original position shown here below to its new location in front of the axle. I have removed the fender on this side to make access easier as there would be much careful calculation to be sure the relationship of steering geometry would be correct when I place the new steering box to its new location.

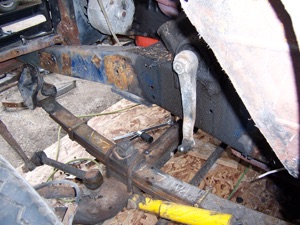


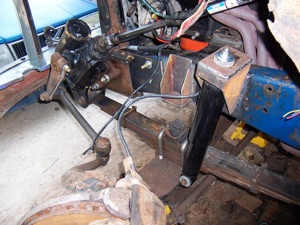
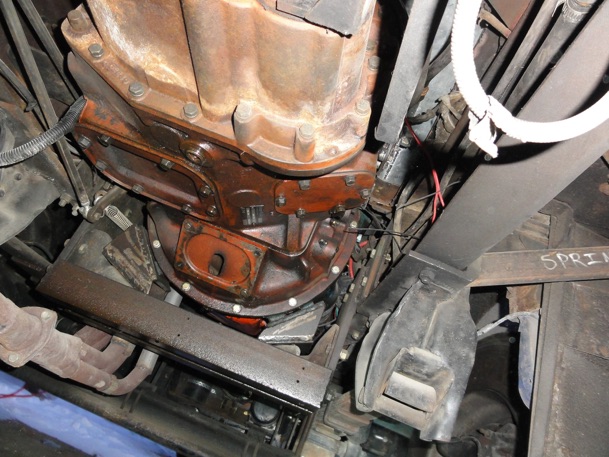
Here is the steering box showing part of the adaptor bracket that serves as the front spring mount. Also shown is the new shock absorber tower

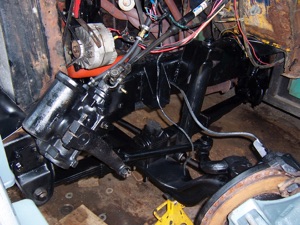
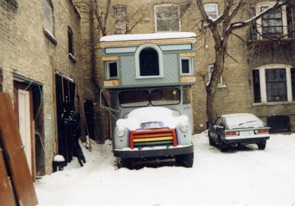
A lick of paint to pretty it all up


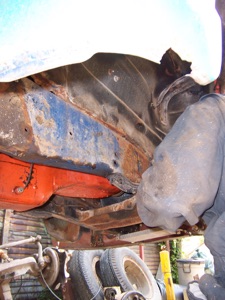
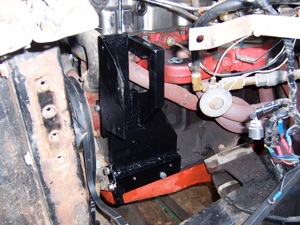
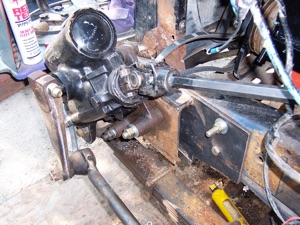
I had to make custom mounting for the power steering pump
Looking like a wounded prize fighter with her fender removed this is the first test drive with power steering - which worked perfectly!
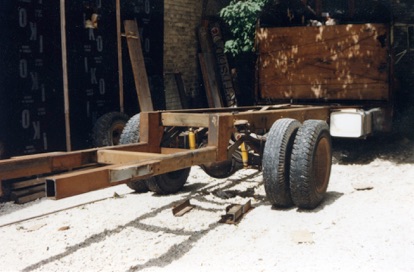
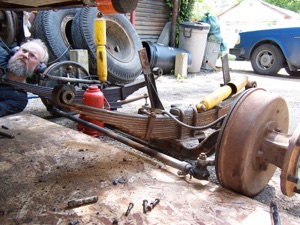
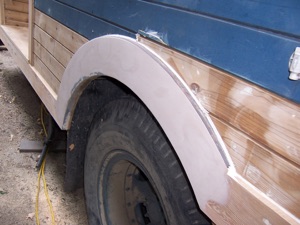
This is how much wider the new front axle is than the old.The front wheels now line up with the outer wheels on the back axle instead of the inner ones.
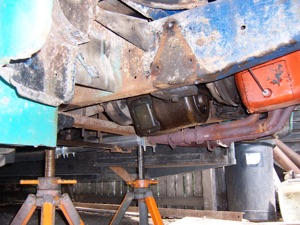
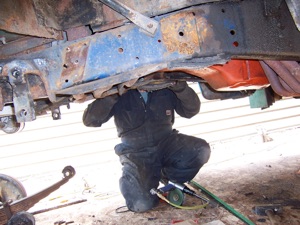
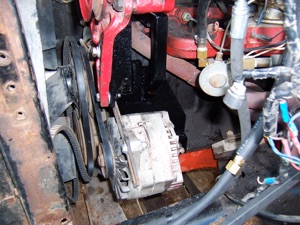
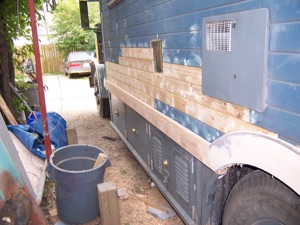
Removing the front fender to get the power steering done really showed me how much easier general maintenance would be if I did not have to hang over the fender everytime.With the hood and fenders up and out of the way I could walk right up to the engine. It was a brilliant idea, but there would be nearly dire consequences................
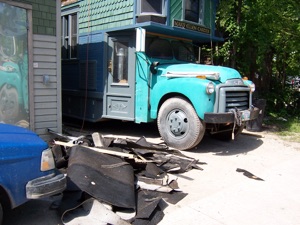
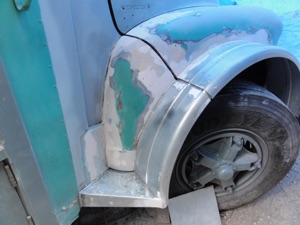
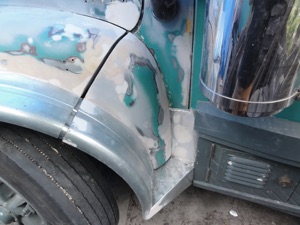
For some reason I did not take a lot of pictures for awhile until the conversion was well underway. You can see the fender extensions I made by splitting an aftermarket trailer fender and grafting it onto the existing fenders. The lines on the galvanized bits are registration marks I made to calculate the compound curve of the fender. Then I basically made an adjustable cage and heavy hinges to support the sheet metal and when I was sure I had everything attached to the new framework I cut everything connecting the fenders and hood to the frame. And here I made my fatal mistake....

I had been working on a receiver for the hood to land on when it closed and this involved numerous trips back and forth to the shop trying different shapes and configurations of brackets. I had ear plugs in as I was grinding. I had been back in the shop no more than 10 minutes and the last thing I had done was weld a small tack weld on the firewall to try yet another shape. I suddenly heard a lot of shouting outside and ran out expecting to break up a fight with neighborhood kids only to find a bunch of my neighbors pointing over my shoulder to the bus, which took several seconds for my brain to process, was now ,for some inexplicable reason, on fire.....
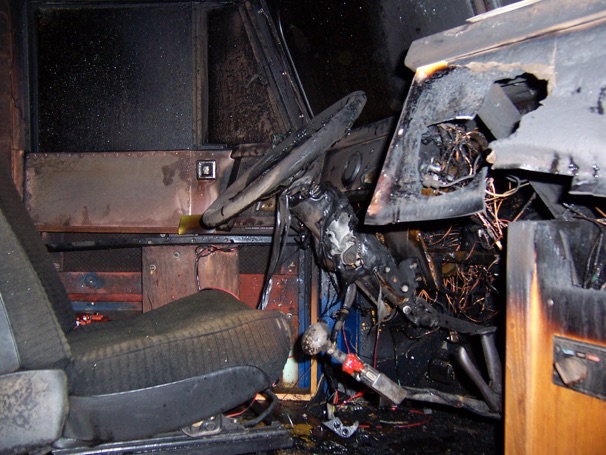

It would seem when I did that last tack weld I created a hot spot on the inside of the firewall which set the carpeting on the floor on fire. By the time I had a battle plan the entire cab was engulfed. The door was locked and Cindy had the presence of mind to grab the garden hose and I started pumping water into a hole left when the air intake duct for the heater melted away. Ironically my big fire extinguisher was actually in the cab in the fire. I had the fire out by the time the fire department arrived. This could have been so much worse. A few more minutes and it would have hit the gas tank and propane tank and there would have been nothing anyone could have done to save my shop or the house!
I really did consider dragging it out to field and finish burning it at this point and cannot help but think a wiser man would have done just that............
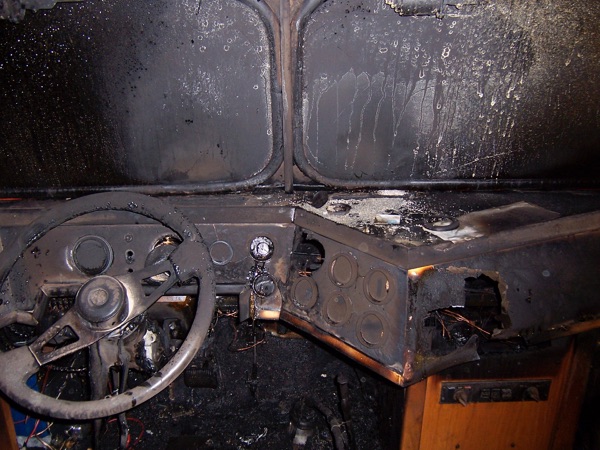
I had a deadline I had to meet in 2 weeks. She had to be roadworthy then. It seemed impossible. The entire cab including the entire wiring harness was ruined. But the next night my big buddy Shawn was there and he and Cindy spent the next several nights scraping burnt wood and melted plastic from the cab while I scrambled to finish the front end. I wound up making a hydraulic lift from a used electric pallet jack pump to raise and lower the hood and then turned my attention to the cab to make a new wiring harness. Luckily automotive electrical is one of my things. I made a temporary dash with basic instruments, replaced the steering column,, windshield glass etc. I also made the new front bumper and added the external air filter in this time. This was her just 2 weeks later!
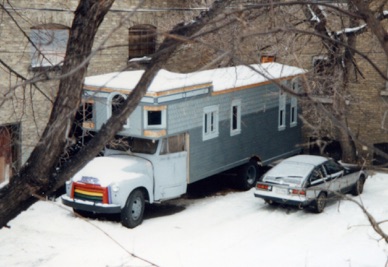
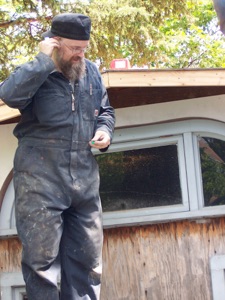
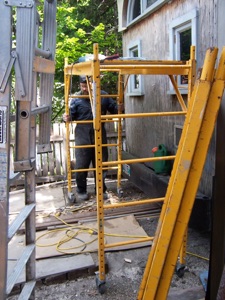
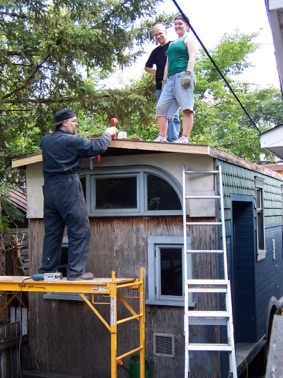
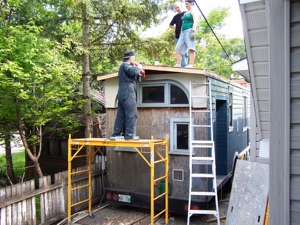
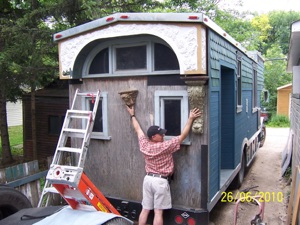
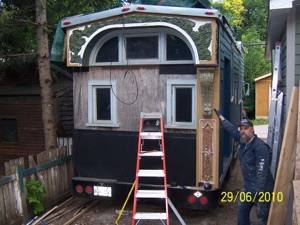
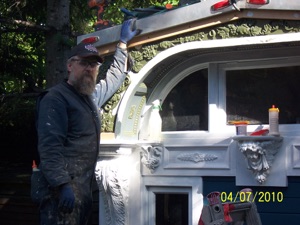
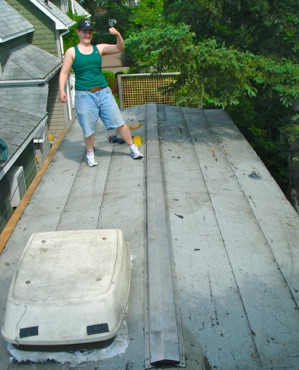
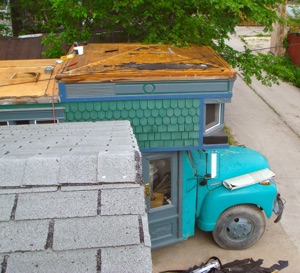
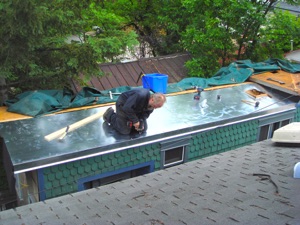
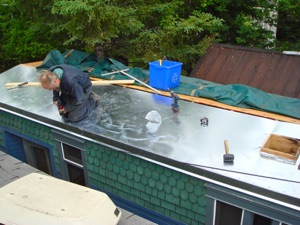
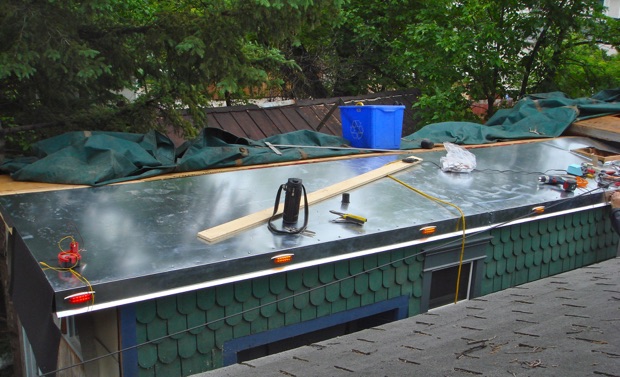
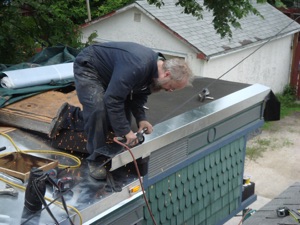
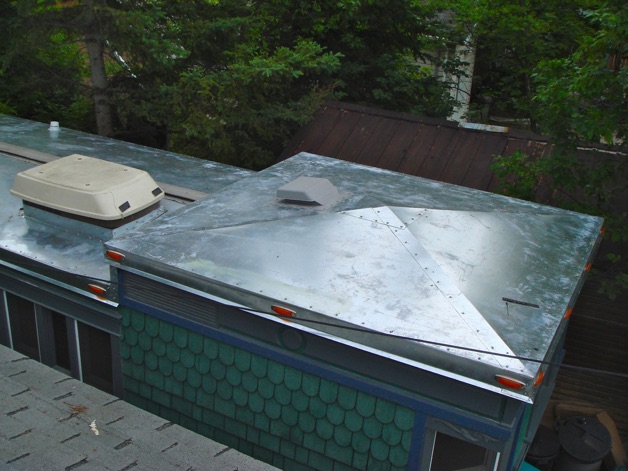
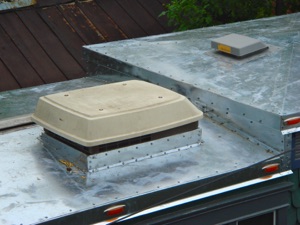
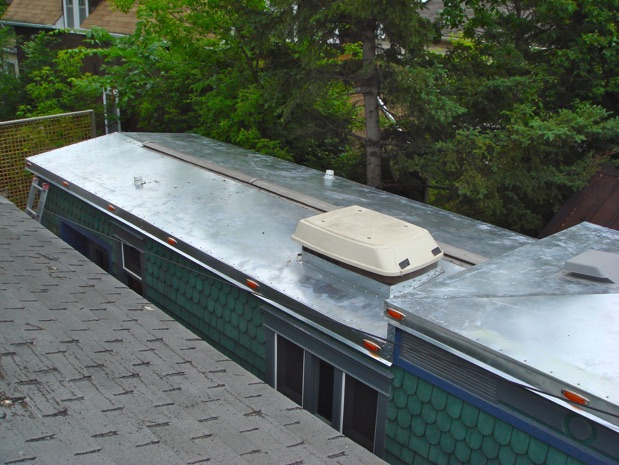
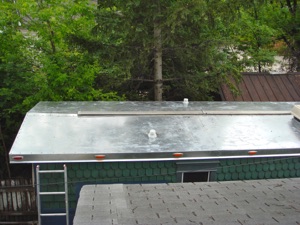
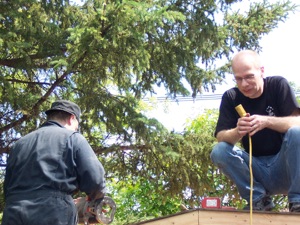
When I originally built her I was stuck on what to clad the roof in. I wanted to use steel but my fear of rust and rot resurfaced immediately. As a temporary solution at the time I clad it in lowslope rolled roofing. By this time it was toast and so off it came . Cheap bituminous membrane was now commercially available by now and by cladding the wood in this before the steel my old fears were finally allayed. My friends Greg and Courtney are seen here helping at different stages of the refit. She now has a skin of 18 gauge galvanized.


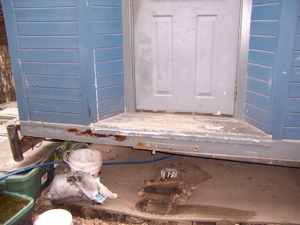
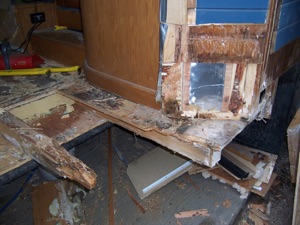
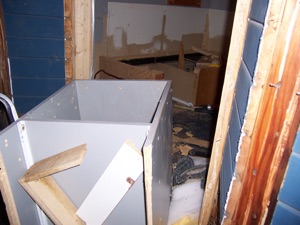
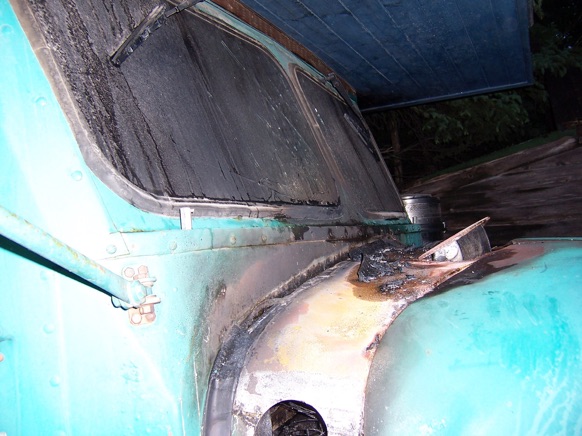
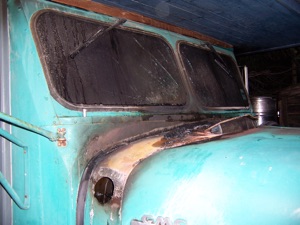
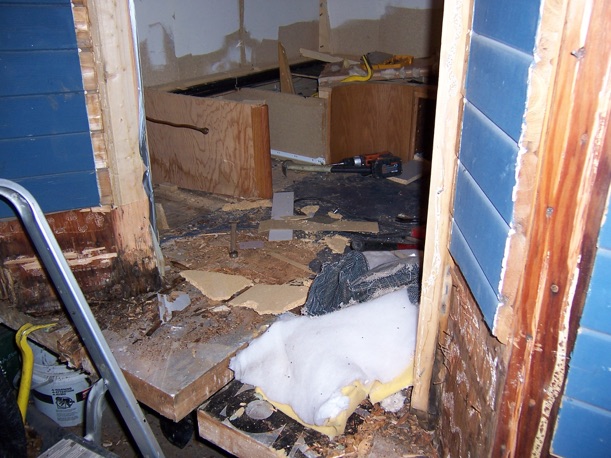
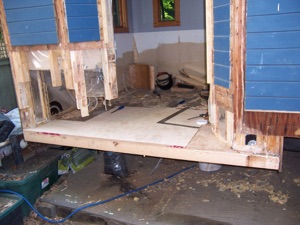
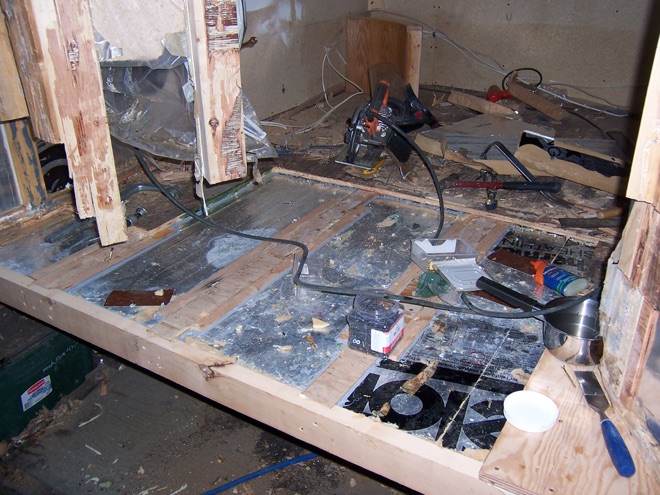
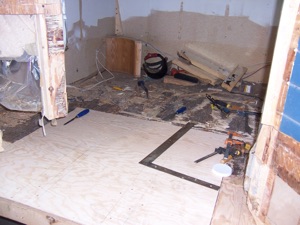
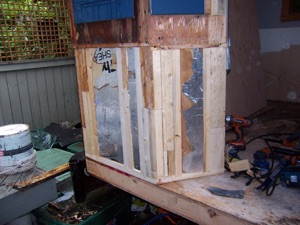
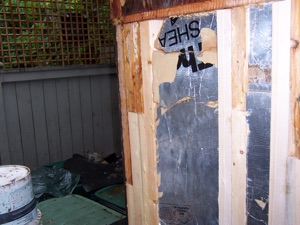
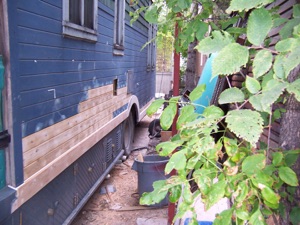
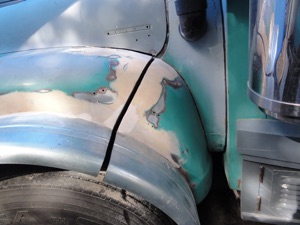
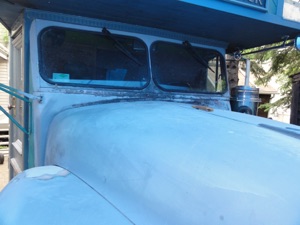
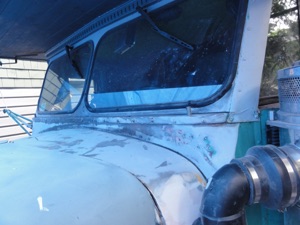
While Miss Mary had been sitting in her long hibernation I had begun to notice these rot spots running off the fender on each side. I wish I had done something about this a lot sooner. what was happening was the curved part which I had made of plywood, had lost its paint and water has been getting sucked into the plywood for years and transmitting it into the end grain of the wooden trim. It appeared to have rotted out the first few feet of the wood running under the door and over the lower storage compartments. I began to probe only to find a much bigger problem.
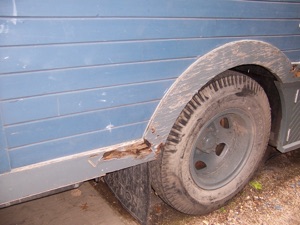
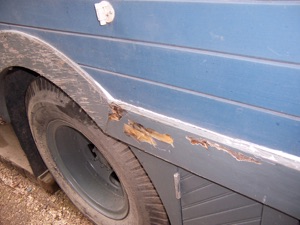
While in her stasis period one of the pieces of wood that made the rear door sill had warped up meaning that all the water that had run over it for years had been wicking up under the sill and rotting out the floor and all her precious wooden framing. A dental hygienist friend of mine said to looked like a decayed tooth!
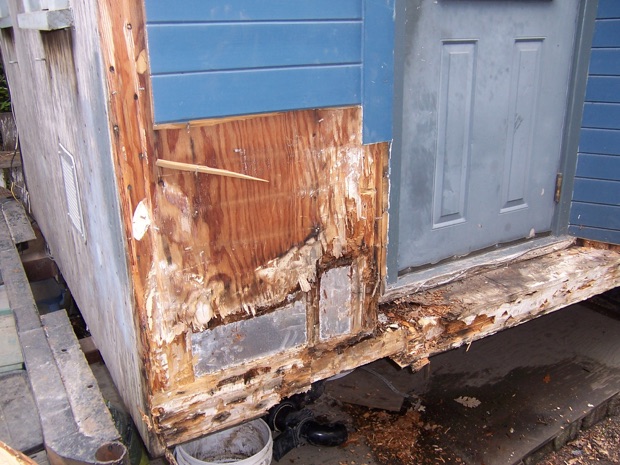
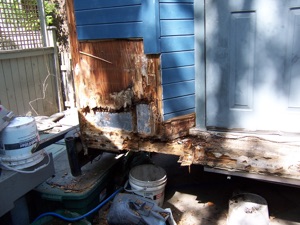

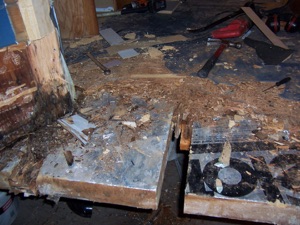
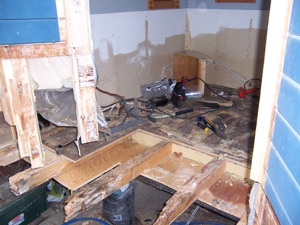
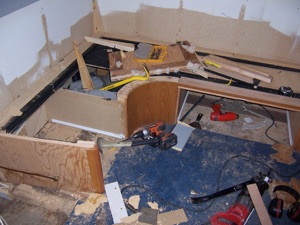
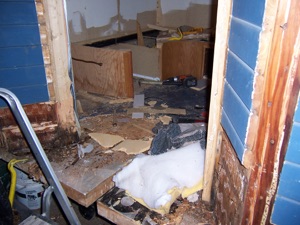
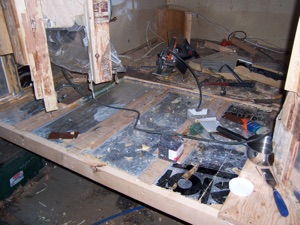
I began to realize the rot went deep inside. All the finished millwork in the back would have to be scrapped just to find how far it went!


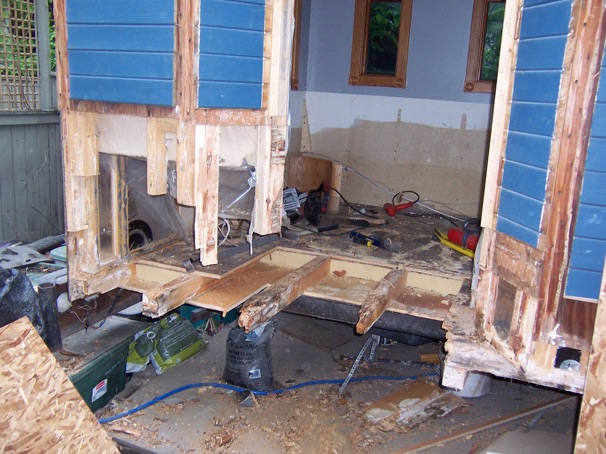

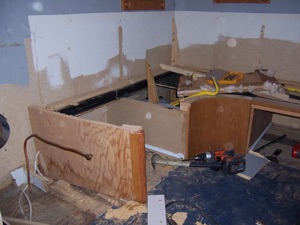
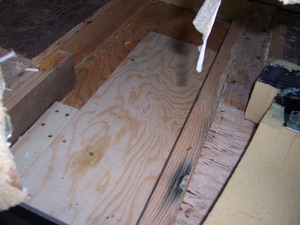
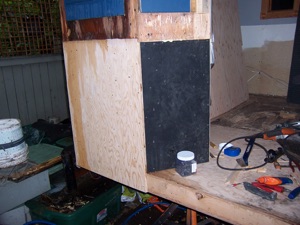
It seemed to go on forever and again it would have been a good time to throw in the towel, but I had already rescued her from fire, put in the new front end and roof. What else could I do but keep moving forward? Luckily I still happened to have a few unused original 4x4 floor beams left over from the original build .These would prove invaluable as I grafted them onto replace their rotted counterparts.


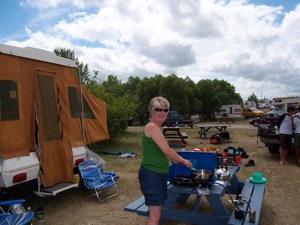
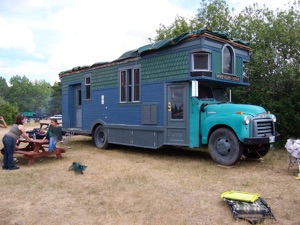
Some of the shows we took Miss Mary to a few years ago had her looking pretty rough as the restoration process continued

This time when I made the curved bits I made a mold and cast them in resin and fiberglass!
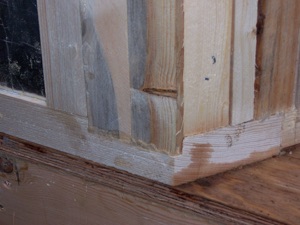
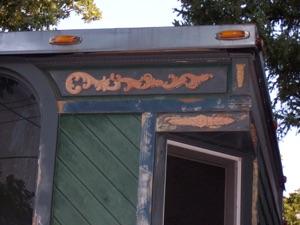
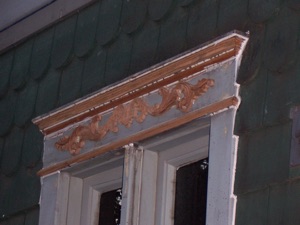
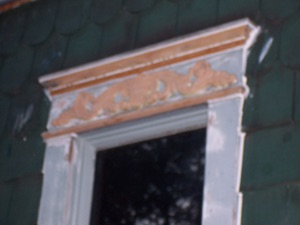
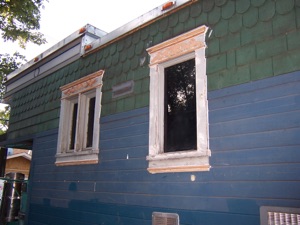
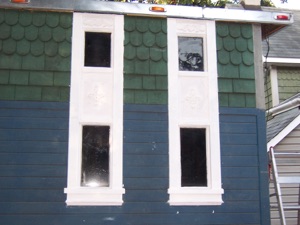
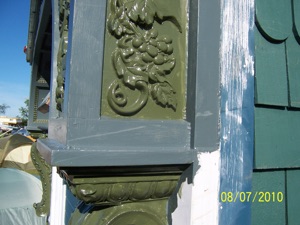
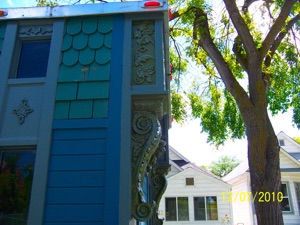
A lot of her window trim had deteriorated as well so I restored that and added a few things as well

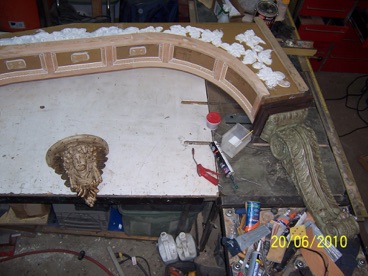
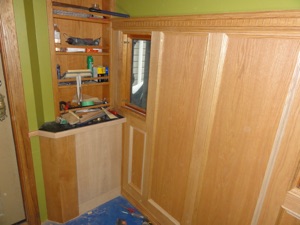
Spring of 2010 had me thinking it was finally time to al last finish the back of miss may which for all these years had just been a wall of plywood. I began by making the arch out of crezone plywood and kerfing moldings to follow the curves creating the curved wainscoting. I have always loved this look!
The various grapevines I salvaged from a polyurethane chair rail molding by cutting them up and reshaping to create the various paths I wanted them to follow. I was lucky to score these lightweight resin castings to help create her nautical theme.My friend Craig is seen here helping me mock up the final look.


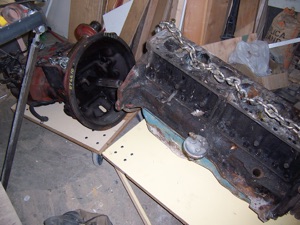
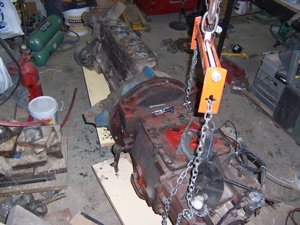
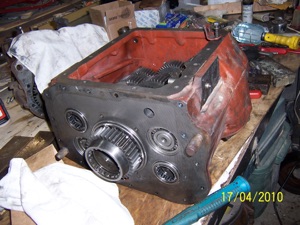
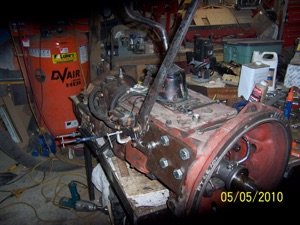
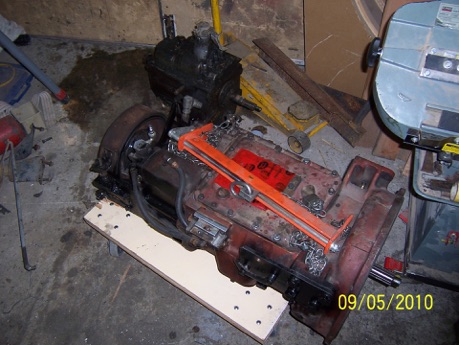
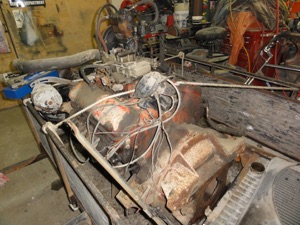
If you have been following the story this far you might remember that up till now Miss Mary is STILL being powered a relatively small (292 cubic inches) six cylinder engine! I have added a 4 barrel carb, long tube header into a 3” exhaust, bumped the compression ratio up etc. Anything after this ( supercharging etc) is just looking for trouble in a hardworking engine. I had been running a New Process 5 Speed trans through a 2 speed axle, but when you are driving a big vehicle , extra gears to pick the right ratio for the job at hand are a must. I considered a dual transmission setup , but they were getting hard to find in good condition. I had met a kindred gear head who told me about the mid sized Fuller Roadranger transmissions. These are the neatest setup as they really are 2 transmissions in one.They come in speeds from 8 - 18 speeds! Some even with overdrives! I set out to find one and discovered that the best size for Miss mary was likely the 10 speed.I searched far and wide for one with an overdrive but there were none to be found. I would have to rebuild one into an overdrive.
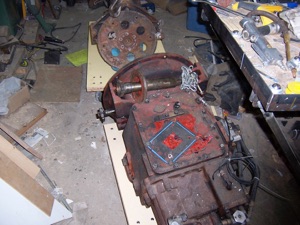
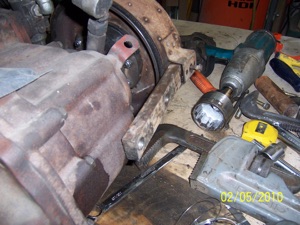
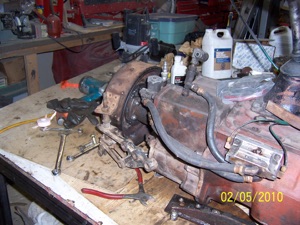
Really the first thing I was going to have to do was be sure I could get this all to bolt together. Luckily I had a spare block I could use to mock the whole thing up. Amazingly GM used the same transmission mounting points for ALL the 6 and 8 cylinder engines in this era! I wound up using the flywheel, adapter plate, bellhousing, dual disc clutch, starter, and release bearing from a 427 V8 truck engine( known as a tall deck) as my donor . I had to change the input shaft as the transmission had been on the end of a 3208 Cat and redo the release bearing linkage from a pull to a push type, but to my amazement it all bolted together!
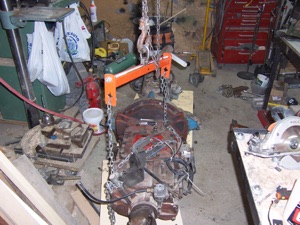
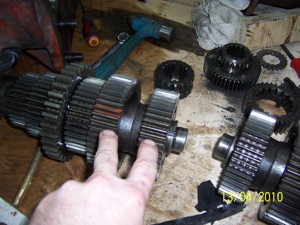
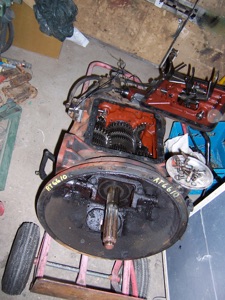
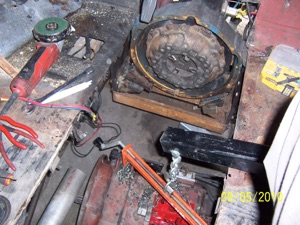
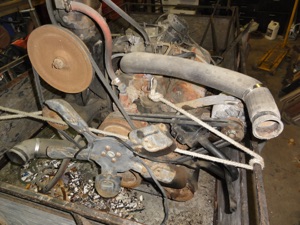
The other cool feature of these transmissions are that they have dual countershafts meaning all the gears are doubled. This also gives you twice the tooth contact for greater strength. To make it into an overdrive you reverse 4th and 5th gear (which I am pointing to) and the new top gear created will become an overdrive when it meshes with the new gear that is replaced on the mainshaft.


When you are done the new gear cluster will look like this. I used some gear paint to help retime the two countershafts to the mainshaft


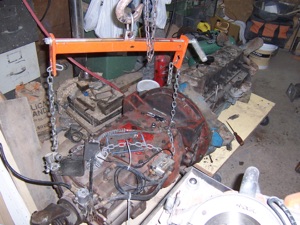
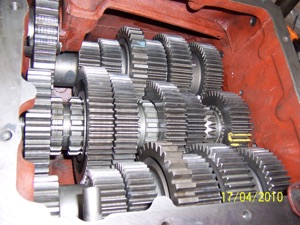
This is the transmission all reassembled and retimed
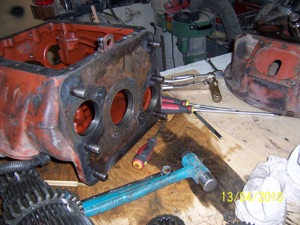
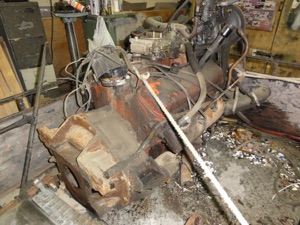
I was going to need a parking brake and I was told these transmissions never came with them, so I would have to once again fabricate something.


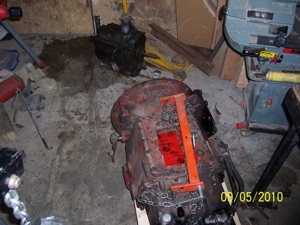
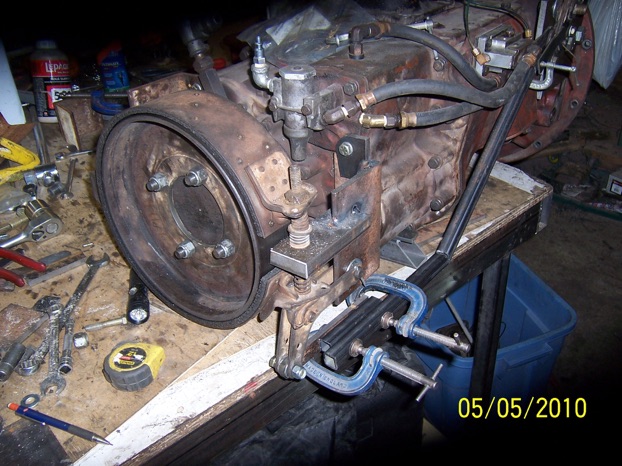
To make a long short very short I wound up salvaging some of the parking brake pieces off the existing Bus trans. I had to use a different style of U-joint receiver out the back of the trans and then I made an adapter plate that bolted to the receiver on one face and the brake drum on the other. Then I made adapter brackets to catch whatever attachment points I could find all over the transmission. It looks a little Frankenstein, but it worked fine. Even the adapter plate seems to run true! The air hoses are for the range shifter that runs on compressed air.
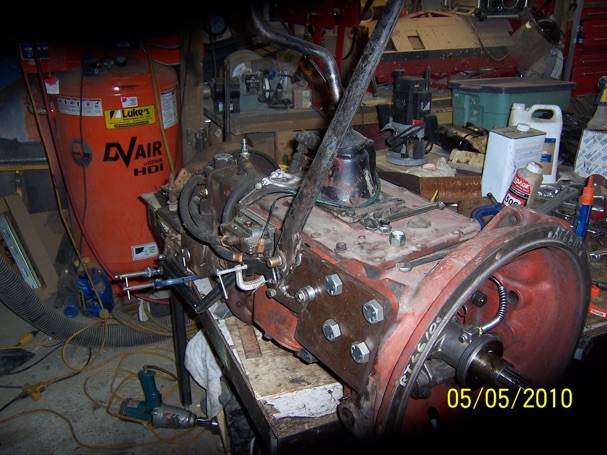
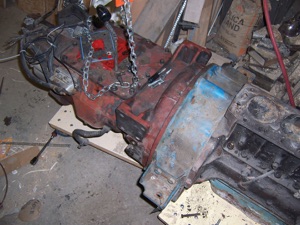
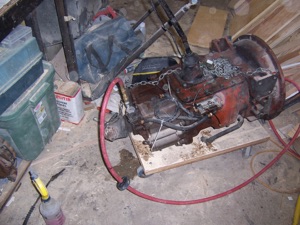
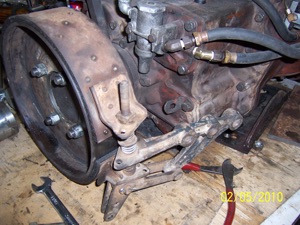
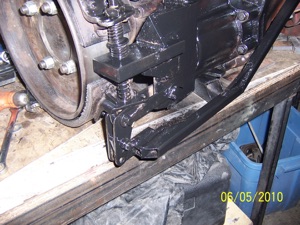
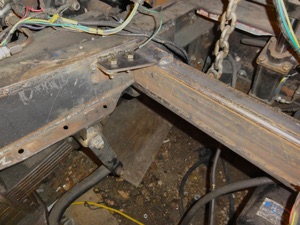
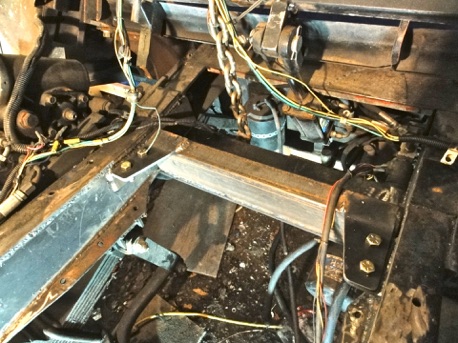
This pic shows the physical size difference between the roadranger and the transmission I had been using! Now the fun part would begin. I would have to make a new crossmember and mounts to support this monster in the bus frame. I started by drilling and tapping new mounting holes in the housing that covers the flywheel and dual disc clutch


Space was so tight I had to cut out the existing crossmember and make a new one by bolting on 5/8 by 6” steel plate. Then I formed a crossmember with 3/8” angle iron and bolted on a set of salvaged trans mounts and brackets. The final attachment was made with the triangular adaptor plates you see here. I made new clutch linkage with a homemade bellcrank.
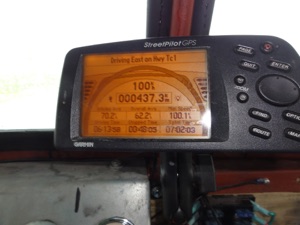
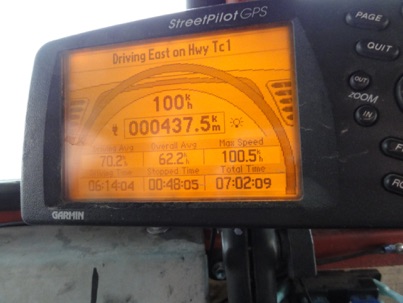
With the new transmission here is the proof that on a good day with the wind blowing the right way and using every trick in the book to keep her in her torque band, Miss Mary was able to do 100Km/hr (about 62 Mph) - the fastest she had ever gone! Was able to drive like this for about an hour till the wind changed.

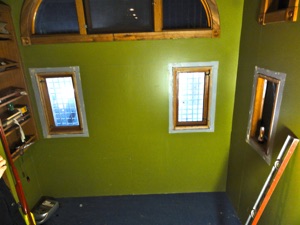
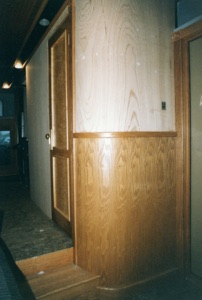
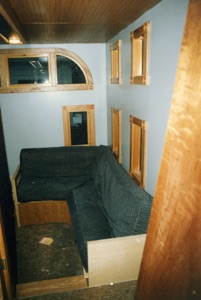
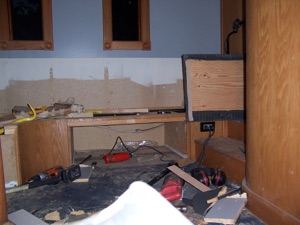
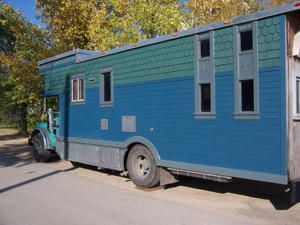
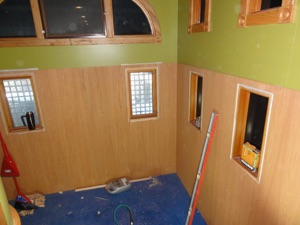
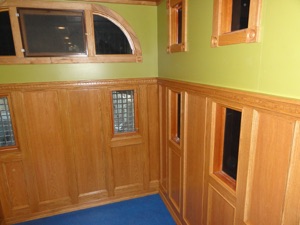
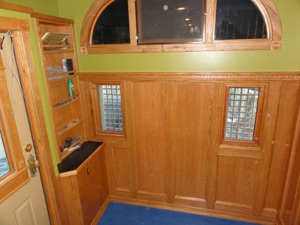
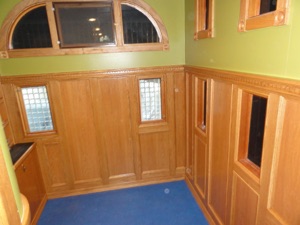
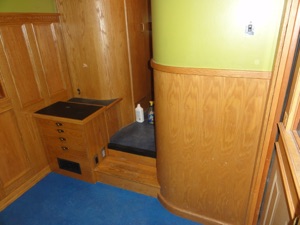
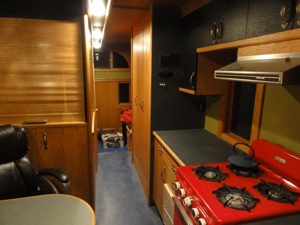
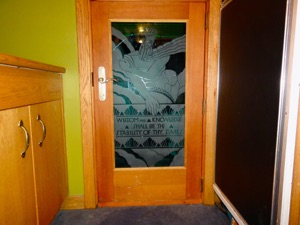
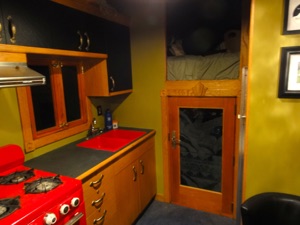
So this is the back of the inside of Miss Mary.. Since I had repaired all the rot previously it was now time to do something to finish this area. It was kind of useful to have waited a few years to finish this are because we had begun to notice it was quite a valuable space to leave clear. It gave us a place to transport band equipment, a makeshift bedroom for our fellow bandmate Pat and a great place to warm up before we went out on stage. I I had always wanted a nautical feel for MIss Mary and so here was my bid to appoint this area as a Captains Quarters in Oak wainscoting!
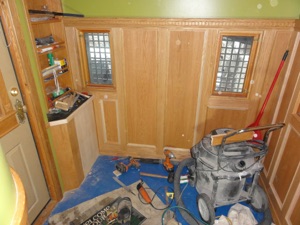
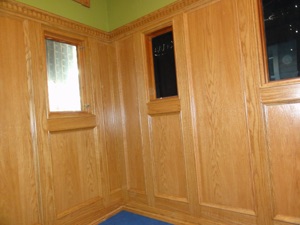

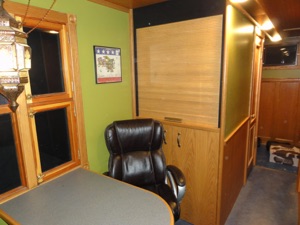
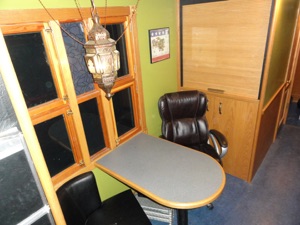
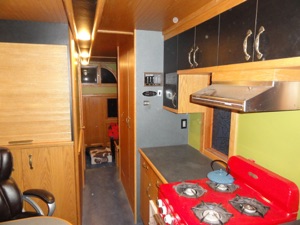
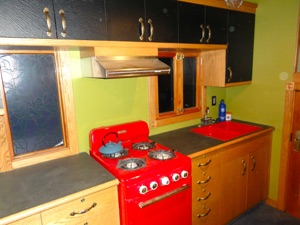
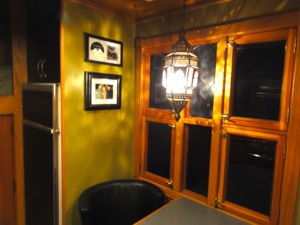
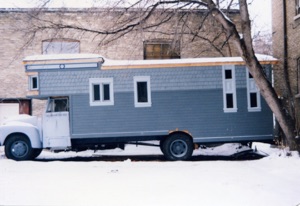
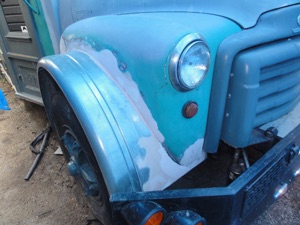
So as you can see the interior is about done. The future will likely hold a refit of all the lighting to LED type. And there will always be tweaks. But now top priority had to be given to the outside of the cab which had been neglected for some time now. I did not have a big enough space to do all the bodywork or paint so it would have to be done outside. I erected a tarp over the whole front and went to work. I decided to set a limit as much bodywork as I intended to do as I had begun to realize you could easily make yourself barking mad trying make the body perfect. I decided to make it reasonably clean as there were lots of other places to rest your eyes on other than the endless tiny imperfections that come with restoring an old vehicle
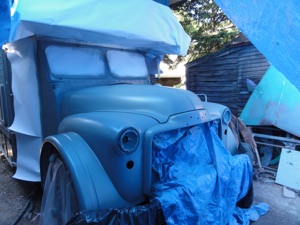
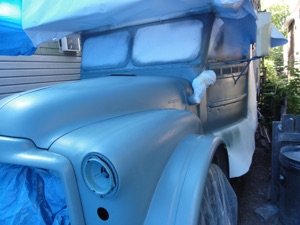
I used a two part epoxy primer and shot the paint with a base coat/clear coat system - the first time I had ever used this type of paint. I could not have been happier with the results! I haven't even polished it yet. For an outdoor paint job this is about as good as it gets! Somewhere in this part I had made the wild looking turn signals and finally installed a keepsake from my childhood - the big yellow driving light. Leftover from a towtruck project I did with my father when I was maybe 12 or so. It was very cool to finally see it being used. It is hooked into the headlight system and acts as a ditch light to watch for deer.

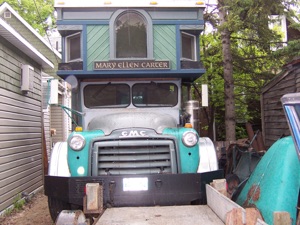
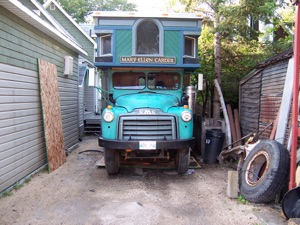

The Mary Ellen Carter is the official tour bus of StillStanding. To learn more go to : www.stillstanding.ca

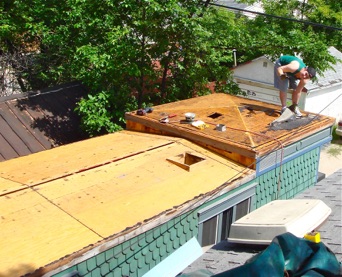
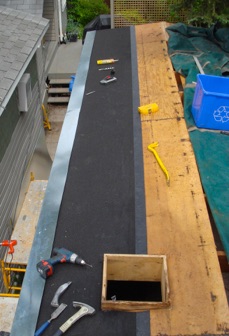
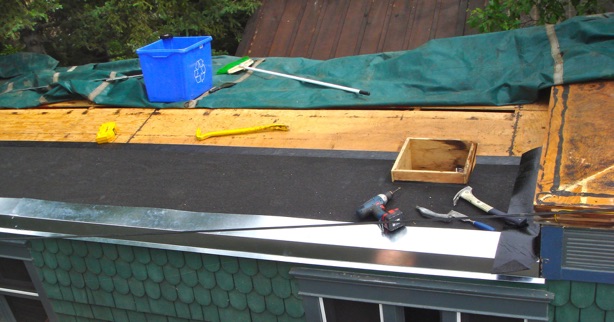
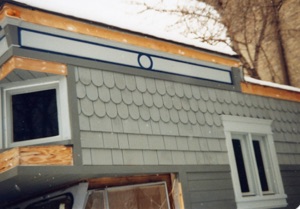
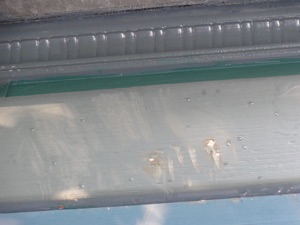
After stripping off the old low slope roofing I needed to plan for a string of LED marker lights all around the edge of the roof and so before I applied the roof edge capping I routed a trough into the fascial and strung a wire that I could tap into by punching holes into the edge capping to connect the lights afterwards as I went.
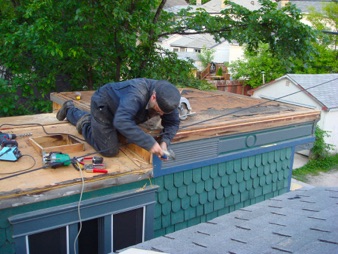
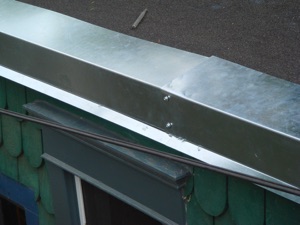
The membrane is applied first and then the capping. The sheet steel is then sealed flush with the edge of the roof over top of the capping and then sealed with a clear roof sealant. I used metal roofing screws to fasten the whole thing down.
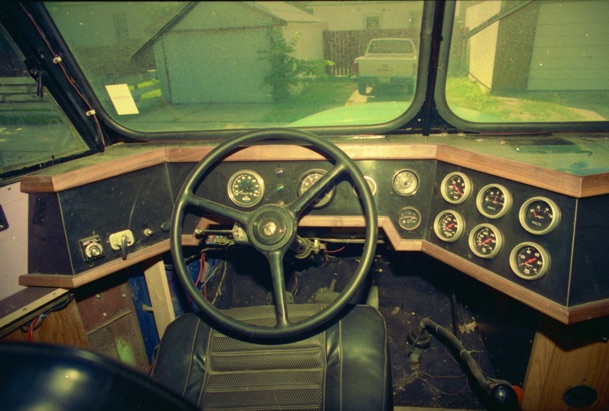
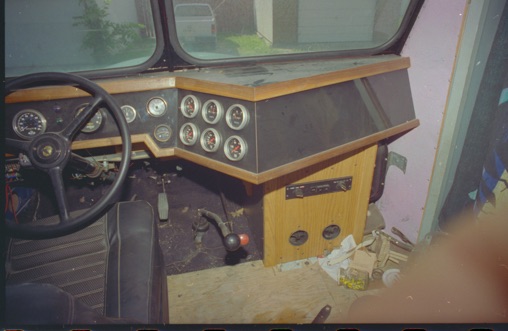
As you can see the cab was nearing completion. I had built a walnut edged dash and fitted it with a nice set of AutoMeter guageserrrrr
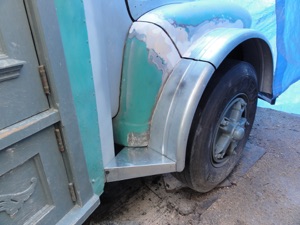
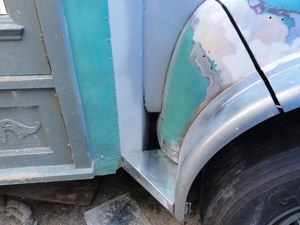
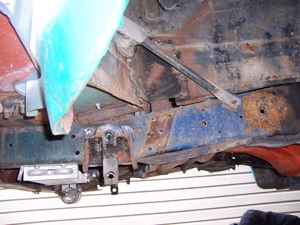
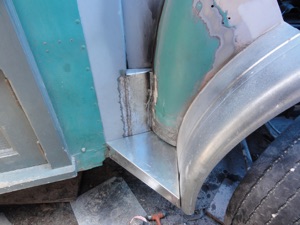
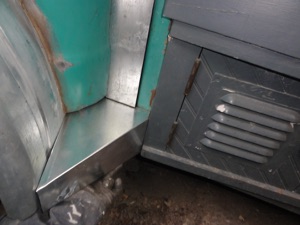
I added these reinforcing step plates to tie the fenders to the body and generally reinforce the fender extensions and then filled in all the gaps. I made them in my shop out of 18 gauge and was pleased with resulting effect. I t gives me a place for some future LED marker lights at the same time.


P.S. If you like this type of vehicle check out Mr. Sharkeys webpage! He has collection of converted trucks, buses and trailers sure to please - http://www.mrsharkey.com/
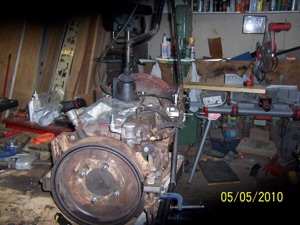
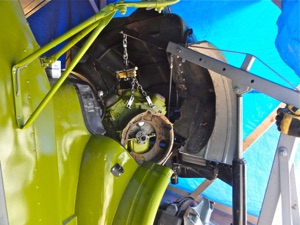
Here is where it was time to upgrade Miss Mary’s engine bay. To continue follow the next page titled “ Miss Mary’s New Engine” in the header bar above.
